
The Cacti device is an open-source, web-based answer for community monitoring and system graphing in IT companies. Cacti permits customers to ballot companies commonly to create graphs utilizing RRDtool.
It’s usually used to graph time-series information for metrics like community bandwidth utilization, CPU load, working processes, disk house, and extra.
On this how-to, we are going to display the right way to set up and arrange a complete community monitoring software known as Cacti utilizing the Web-SNMP device on RHEL-based distributions akin to CentOS Stream, Fedora, Rocky, and Alma Linux, utilizing the YUM and DNF bundle supervisor instruments.
Cacti Required Packages
The Cacti required the next packages to be put in in your Linux working system.
Apache : A Internet server to show community graphs created by PHP and RRDTool.
MySQL : A Database server to retailer cacti data.
PHP : A script module to create graphs utilizing RRDTool.
PHP-SNMP : A PHP extension for SNMP to entry information.
NET-SNMP : An SNMP (Easy Community Administration Protocol) is used to handle the community.
RRDTool : A database device to handle and retrieve time sequence information like CPU load, Community Bandwidth, and many others.
For demonstration functions, we used Rocky Linux 9 to put in the Cacti device, however the identical directions work for all RHEL-based distributions.
Step 1: Set up Required Packages in Linux
First, start by updating your system’s bundle repository to make sure you have the most recent variations of software program packages obtainable.
sudo dnf replace
Subsequent, set up the required packages for Cacti and its dependencies utilizing the next command.
sudo dnf set up net-snmp-utils net-snmp-libs rrdtool php-mysqlnd php-snmp php-xml php-gd mariadb-server httpd
Step 2: Set up Cacti Device in Linux
To put in Cacti, ensure that the EPEL repository is enabled in your system.
sudo yum set up epel-release
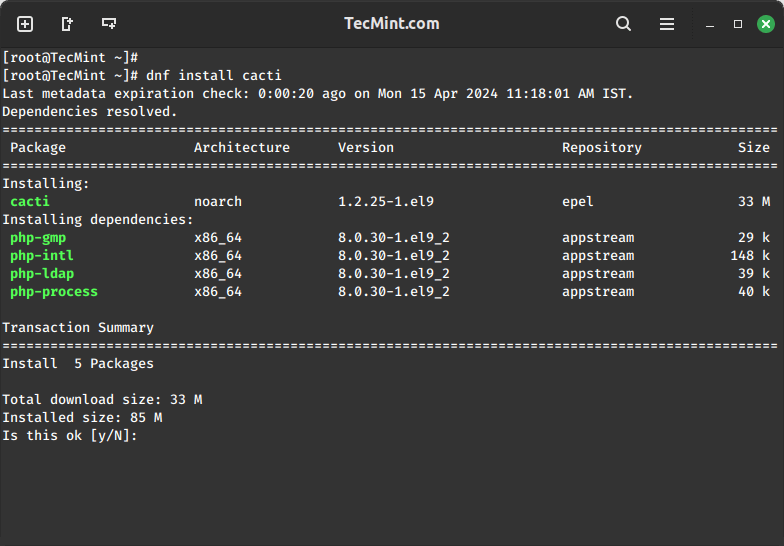
As soon as the EPEL repository is enabled, you’ll be able to set up Cacti by working the next command.
sudo yum set up cacti
Step 3: Safe MariaDB Database
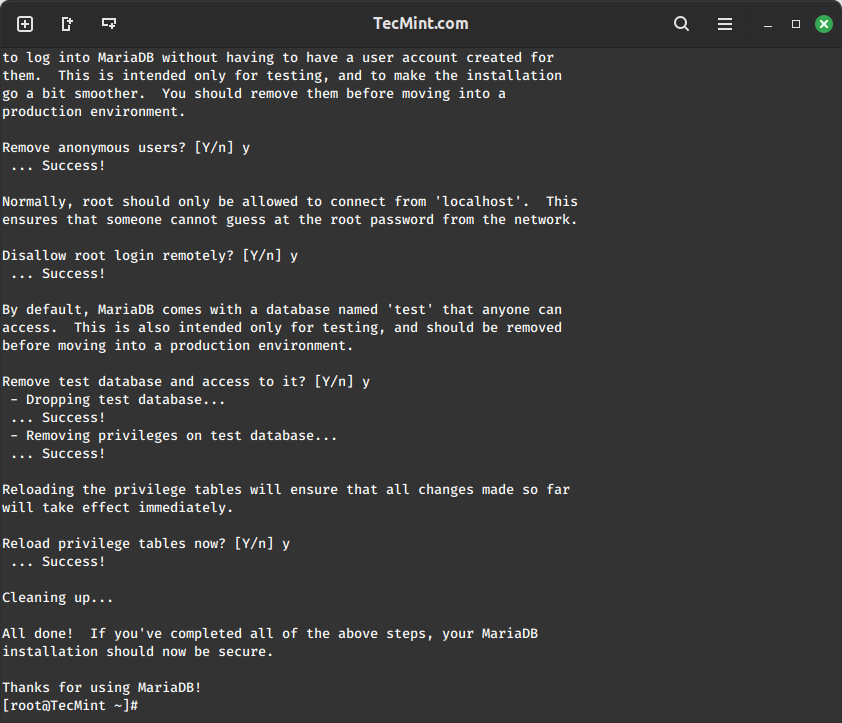
To configure MySQL for Cacti, we should first safe the newly put in MySQL server after which create the Cacti database with the consumer “Cacti“. In case your MySQL is already put in and secured, you don’t want to do that once more.
sudo mysql_secure_installation
Observe the prompts to arrange a root password, take away nameless customers, disallow distant root login, and take away the take a look at database.
Step 4: Create Cacti Database
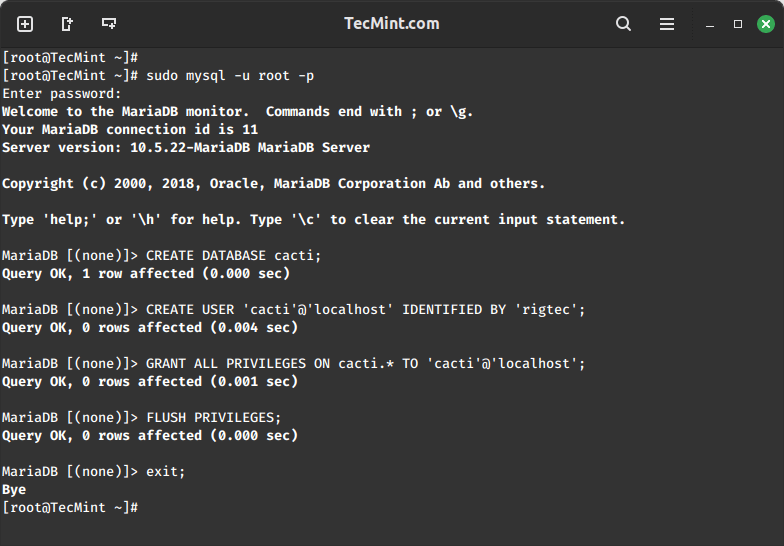
Log in to the MySQL server utilizing the newly created password, after which create the Cacti database with the consumer “Cacti” setting a password for it.
sudo mysql -u root -p
CREATE DATABASE cacti;
CREATE USER ‘cacti’@’localhost’ IDENTIFIED BY ‘your_password’;
GRANT ALL PRIVILEGES ON cacti.* TO ‘cacti’@’localhost’;
FLUSH PRIVILEGES;
EXIT;
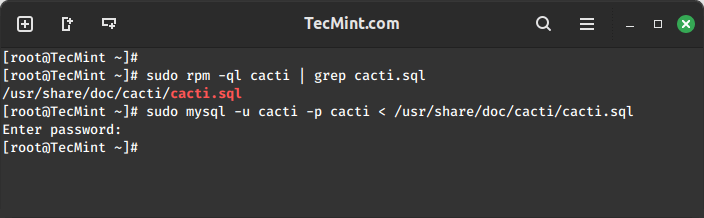
Subsequent, you want to import the default Cacti database schema into the newly created database, however earlier than that, you want to discover out the database file path utilizing the rpm command and import it as proven.
sudo rpm -ql cacti | grep cacti.sql
sudo mysql -u cactiuser -p cacti < /usr/share/doc/cacti/cacti.sql
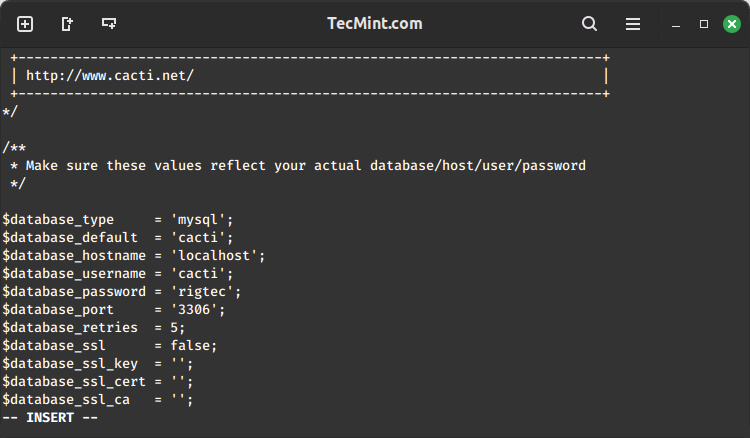
Step 5: Configure Cacti Database Connection
To configure the Cacti database connection, you want to open the configuration file as proven.
sudo vi /and many others/cacti/db.php
Replace the next strains together with your database data.
$database_type=”mysql”;
$database_default=”cacti”;
$database_hostname=”localhost”;
$database_username=”cacti”;
$database_password = ‘your_password’;
Step 6: Configure Apache for Cacti
Open a file known as /and many others/httpd/conf.d/cacti.conf together with your alternative of editor.
sudo vi /and many others/httpd/conf.d/cacti.conf
Add the next strains to the file:
Alias /cacti /usr/share/cacti
<Listing /usr/share/cacti/>
Choices +FollowSymLinks
AllowOverride None
<IfModule mod_authz_core.c>
# Apache 2.4
Require all granted
</IfModule>
<IfModule !mod_authz_core.c>
# Apache 2.2
Order Deny,Enable
Deny from all
Enable from all
</IfModule>
</Listing>
Save and shut the file.
Lastly, restart the Apache and MariaDB companies to use the adjustments.
sudo systemctl restart httpd
sudo systemctl restart mariadb
Step 7: Configure Cacti Cron Job
Now open the crontab file to schedule polling intervals for Cacti.
sudo vi /and many others/cron.d/cacti
Take away the remark from the next line. The poller.php script runs each 5 minutes to assemble information from recognized hosts, which Cacti makes use of to create graphs.
*/5 * * * * cacti /usr/bin/php /usr/share/cacti/poller.php > /dev/null 2>&1
Step 8: Entry Cacti Internet Interface
To entry the Cacti net interface, you want to open port 80 on the firewall to permit inbound visitors on that port.
sudo firewall-cmd –zone=public –add-port=80/tcp –permanent
sudo firewall-cmd –reload
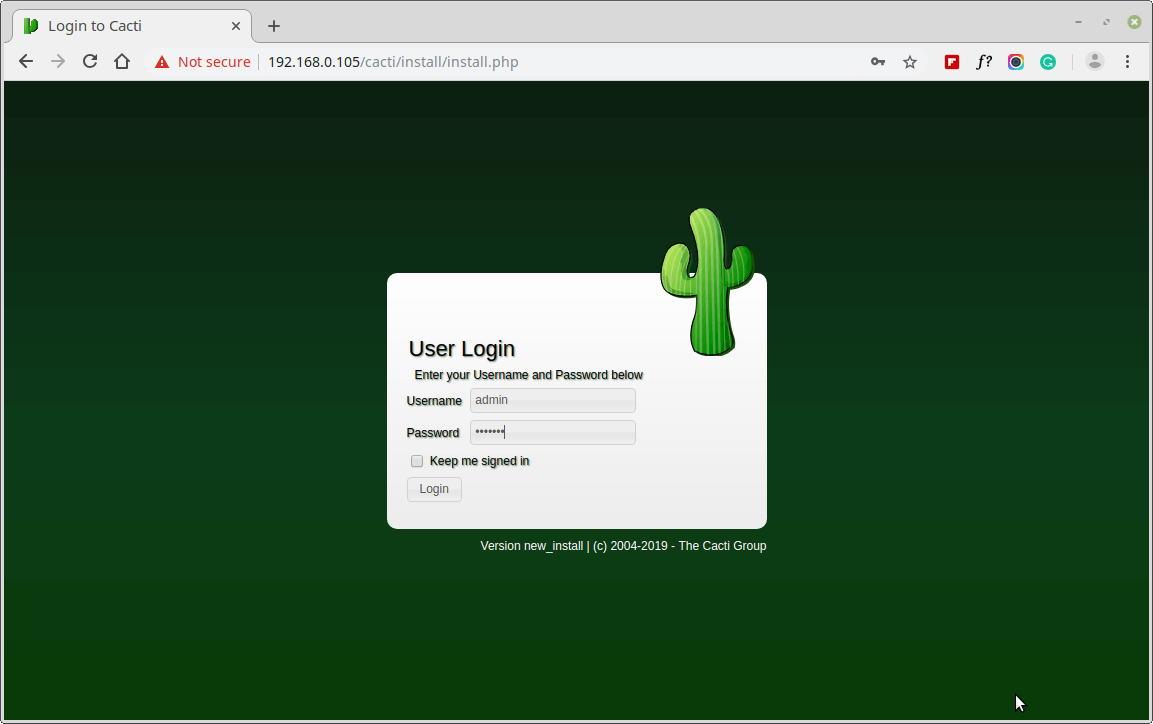
Now you can entry Cacti by way of an online browser utilizing the server’s IP tackle or area title as proven.
http://your_server_ip/cacti
OR
http://area.com/cacti
Now, comply with the on-screen directions to finish the set up course of
Person: admin
Password: admin
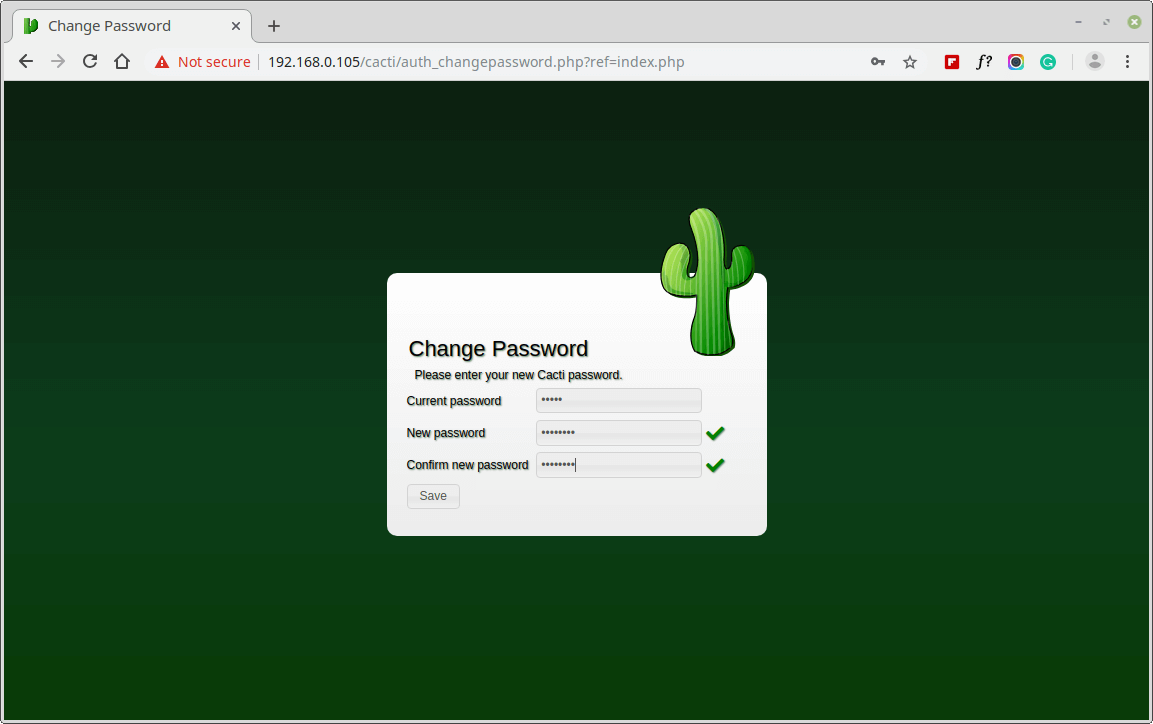
Subsequent, change the default Cacti password.
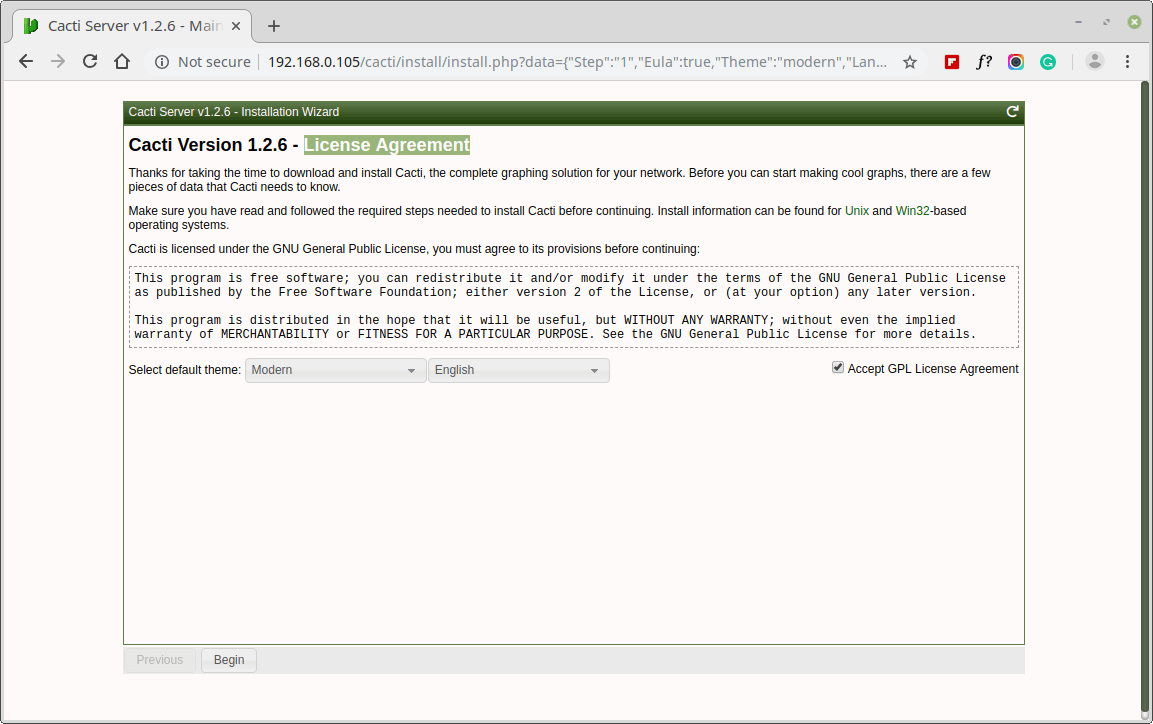
Settle for Cacti License Settlement.
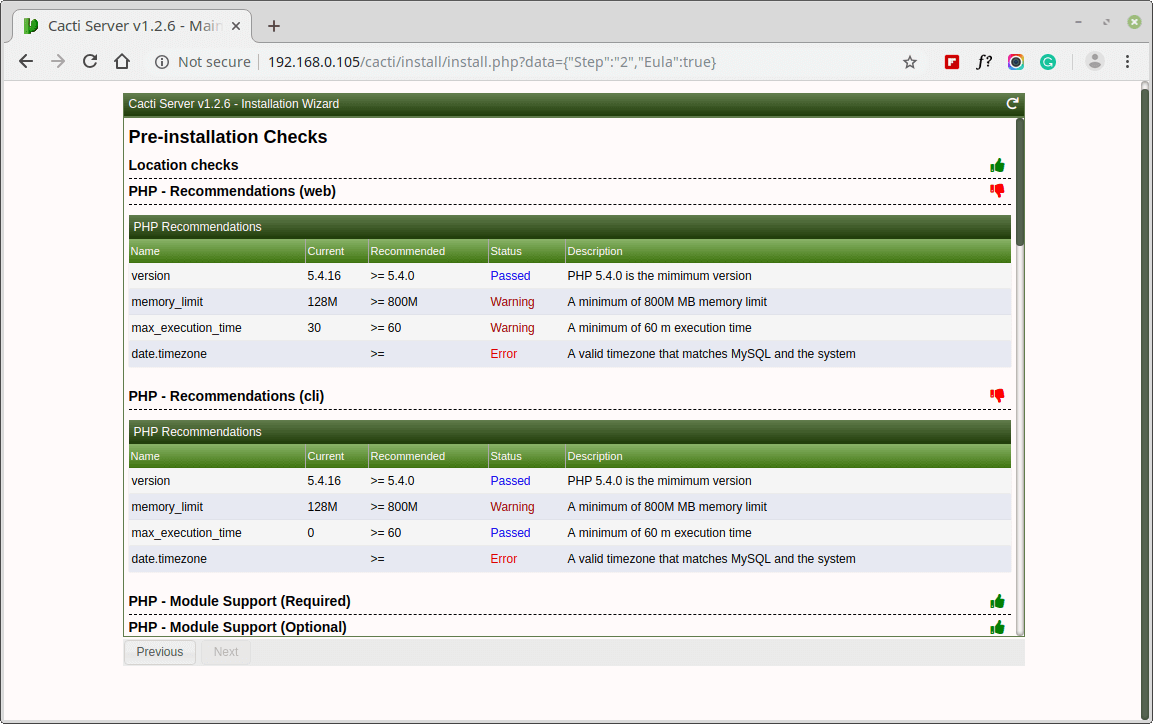
Subsequent, the display reveals Pre-installation Checks for Cacti set up, please right the recommended settings in your /and many others/php.ini file as proven and restart Apache after making adjustments.
memory_limit = 800M
max_execution_time = 60
date.timezone = Asia/Kolkata
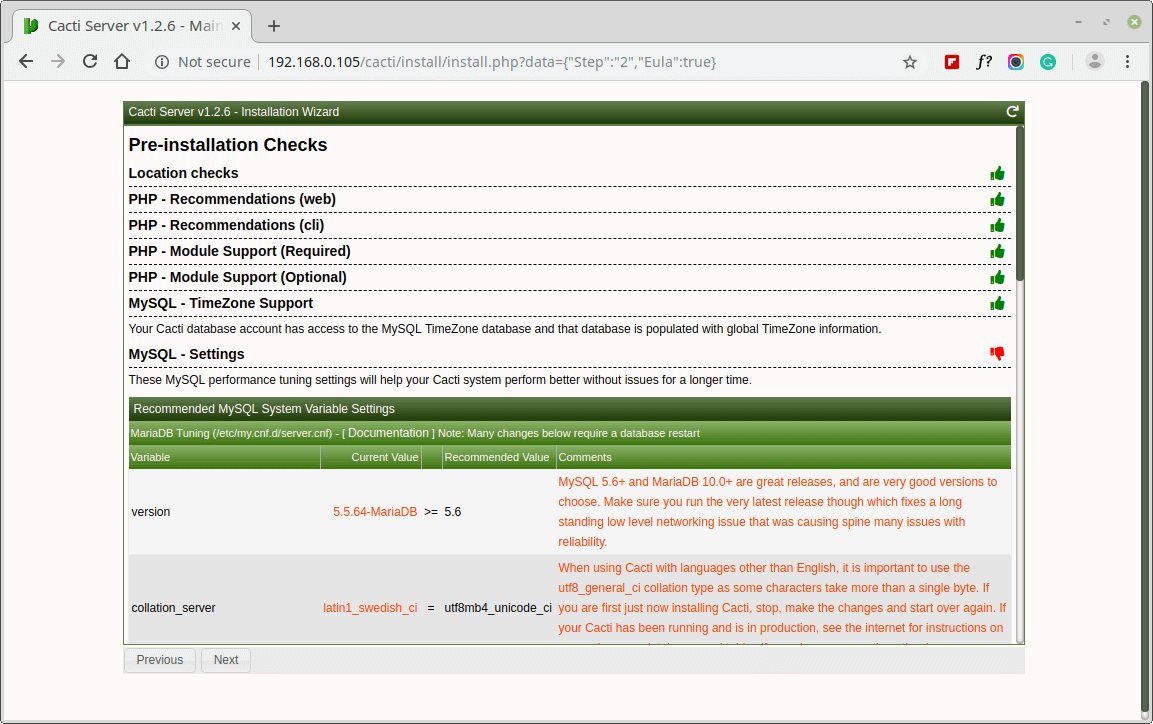
Equally, you additionally must grant entry to the MySQL TimeZone database for consumer Cacti, in order that the database is populated with international TimeZone data.
mysql> use mysql;
mysql> GRANT SELECT ON mysql.time_zone_name TO cacti@localhost;
mysql> flush privileges;
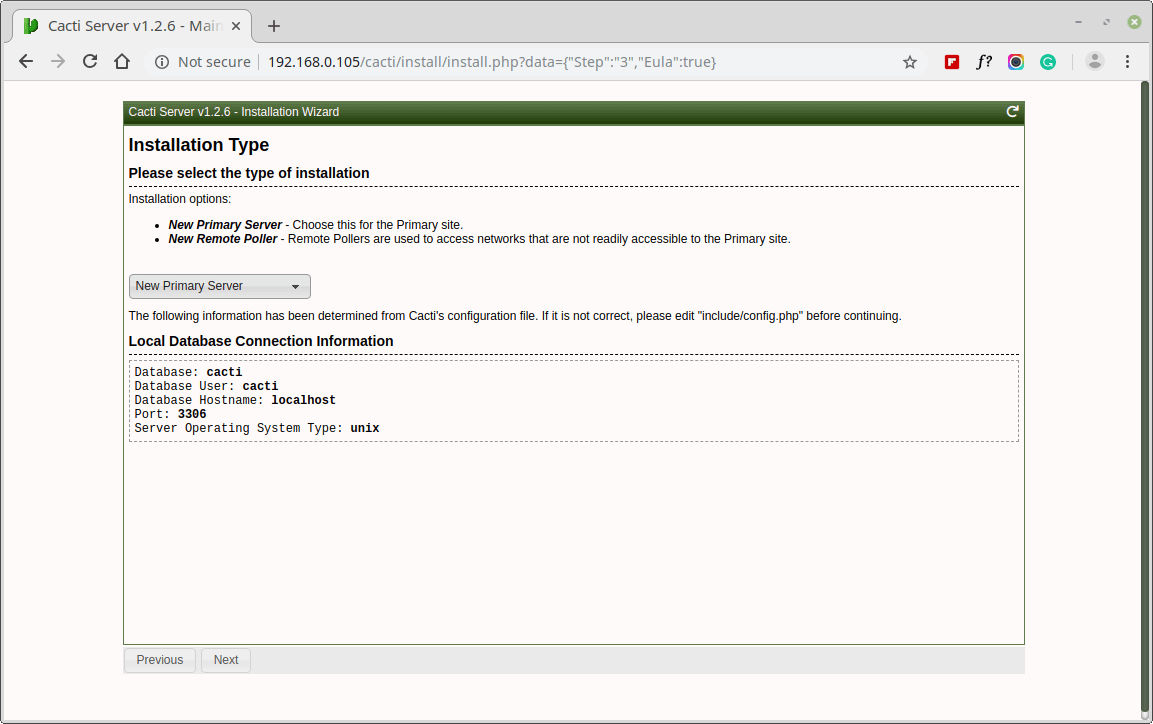
Please select the set up Sort as “New Set up“.
Be sure all the next listing permissions are right earlier than persevering with.

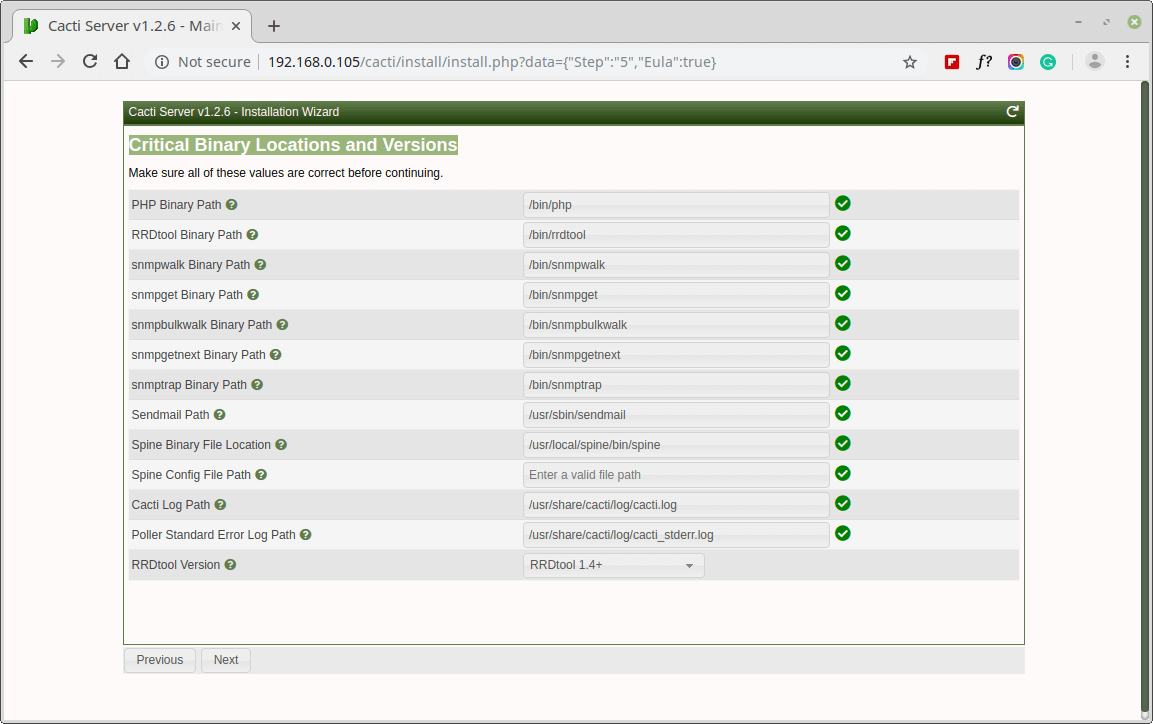
Be sure all of those Vital Binary Areas and Variations values are right earlier than persevering with.
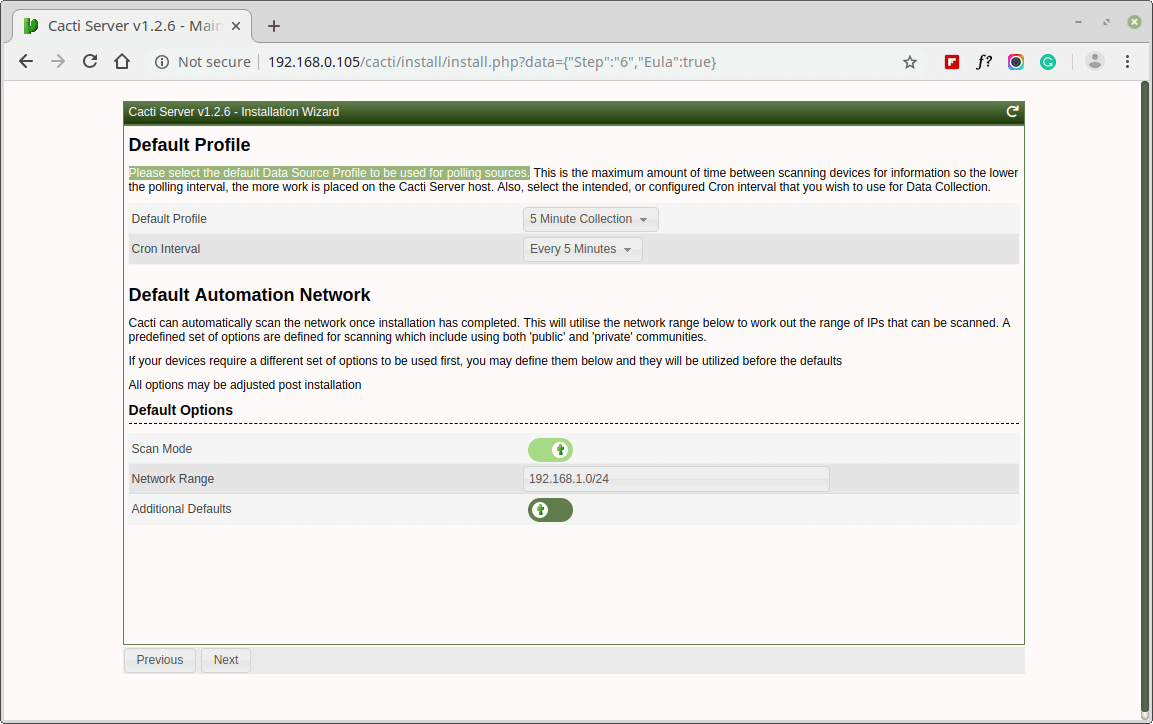
Please select the default Knowledge Supply Profile for use for polling sources.
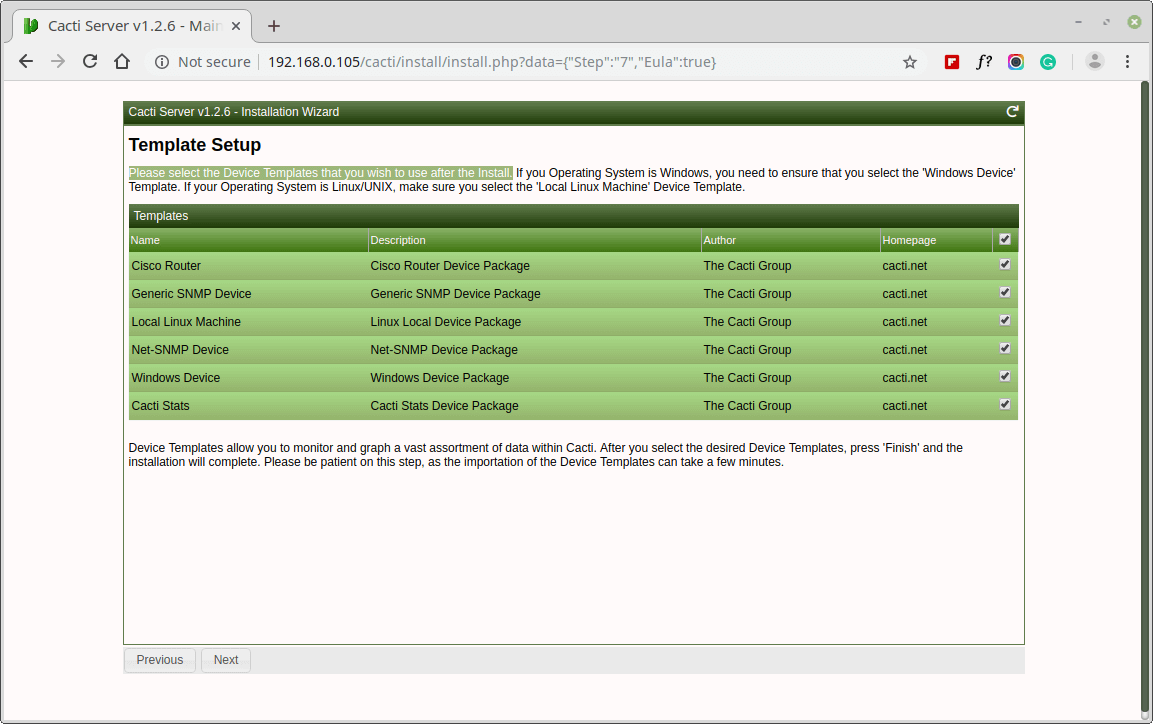
Please, select the Machine Templates that you just want to use after the Cacti Set up.
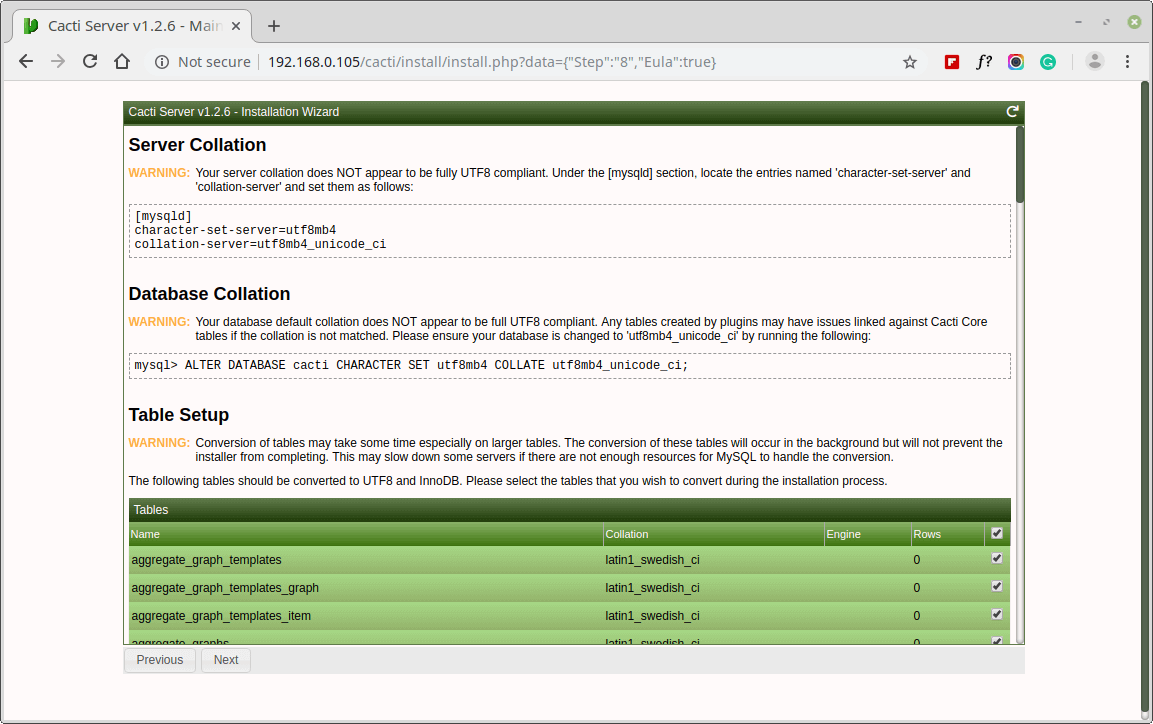
Set the Server Collation in your MySQL configuration file /and many others/my.cnf underneath the [mysqld] part as proven.
[mysqld]
character-set-server=utf8mb4
collation-server=utf8mb4_unicode_ci
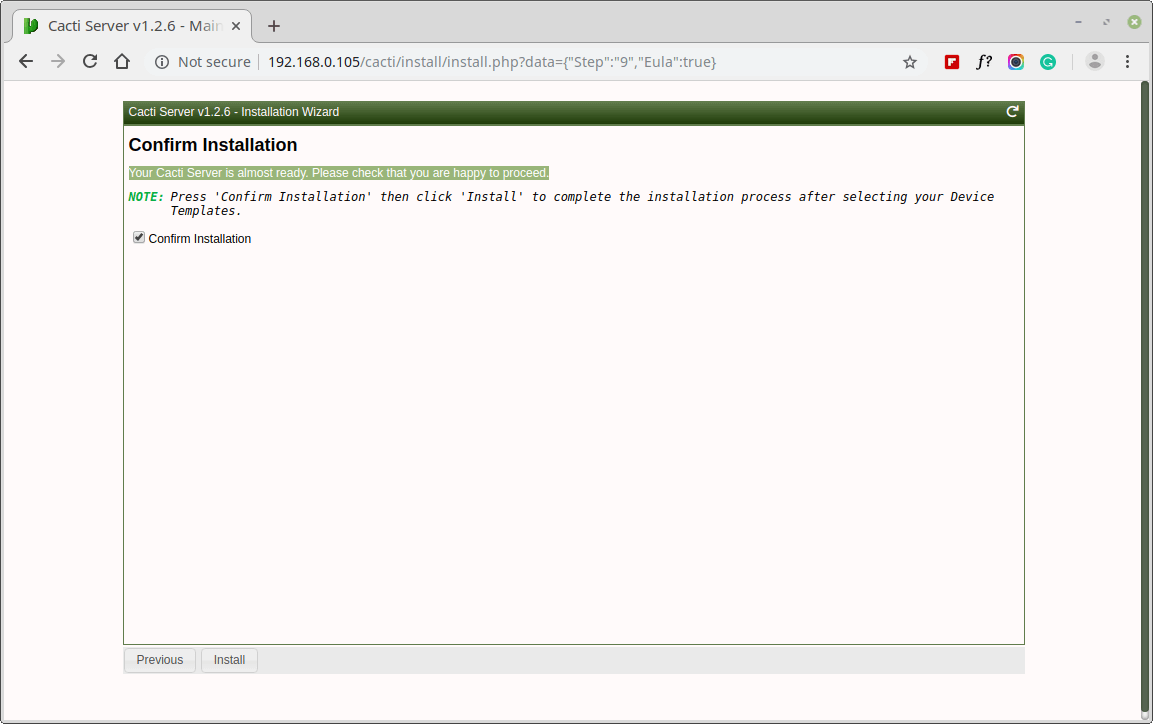
Your Cacti Server is sort of prepared. Please affirm that you’re completely satisfied to proceed.

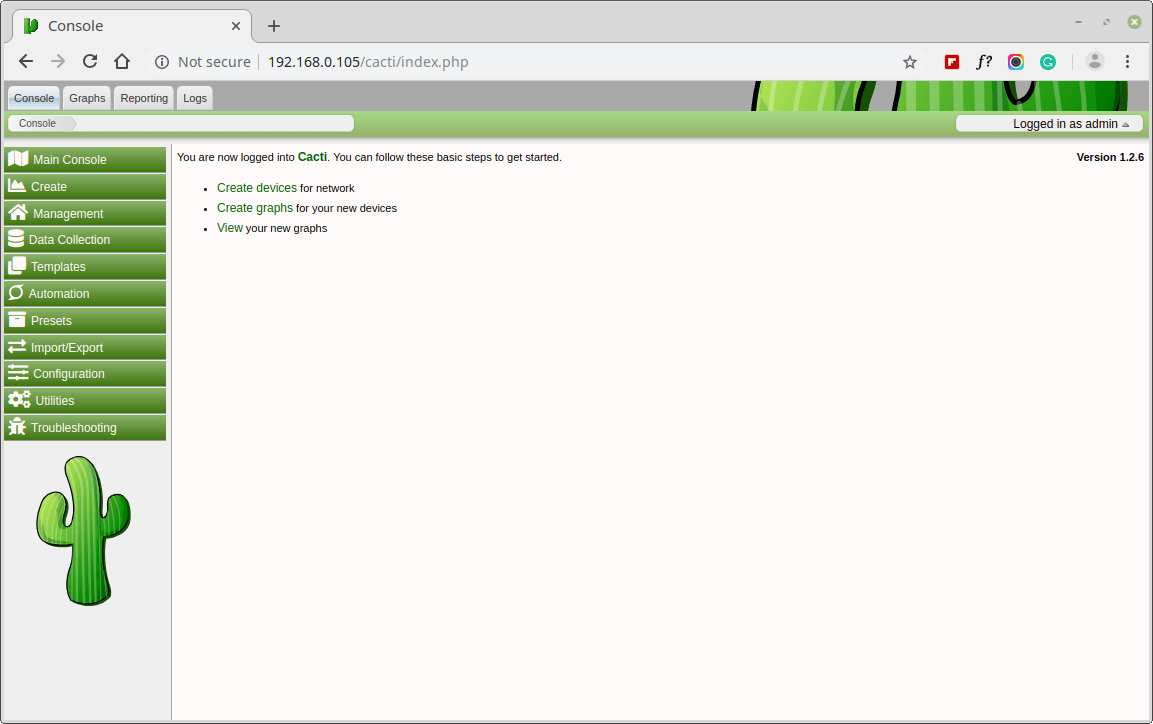
Congratulations! You’ve got efficiently put in Cacti on RHEL-based programs. Now you can begin monitoring your community infrastructure by including gadgets, creating graphs, and organising alerts inside the Cacti net interface.


